How to Format Your External Hard Drive for Mac

April 12, 2017 10:23 am / Updated by Bobby Hills to Computer Tips
Follow @BobbyHills
“Q: How do I format an external hard drive on Mac?
I have a 1 TB Seagate GoFlex external hard drive that I previously used for Windows 7 backups. I would like to use it on my MBP to back up my Photos and iPhoto library as well as a backup for my Family Tree Maker for Mac genealogy. I do have another 1TB G drive used for Time Machine Backups. A step by step to format the GoFlex drive would be greatly appreciated; the easiest way possible. Thanks in advance. Linda. MacBook Pro, OS X Yosemite (10.10.5)”
There are large numbers of reasons about why you would like to format an external hard drive on Mac machine, from clearing it up for a totally fresh installation of OS X, to building a password-protected drive for work, or even creating a partition. No matter what the reasons are, the objective is to format it. Consequently, the steps about how to format external hard drive on Mac are what we mainly discuss here. So let’s see the detailed guide as below.
How to Format External Hard Drive for Mac
Before the process, be sure that your external hard drive is attached and mounted on Mac OS X. If you have already written any data to the hard drive, please back it up before starting the steps.
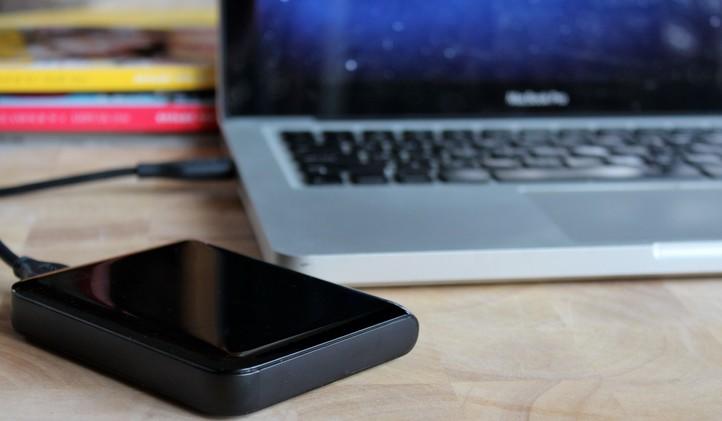
Step 1: Connect the external hard drive to Mac machine.
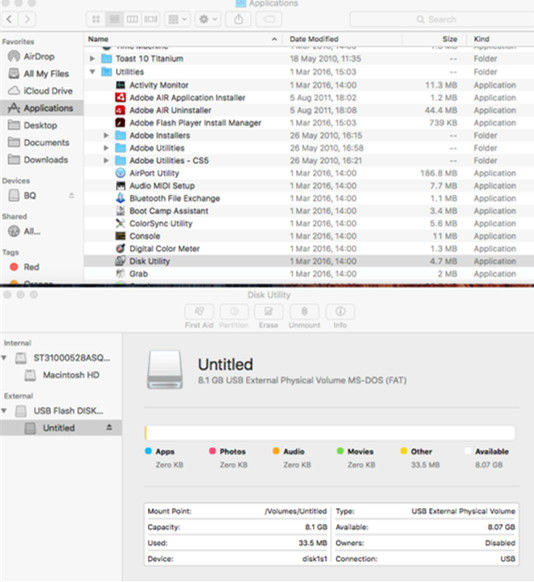
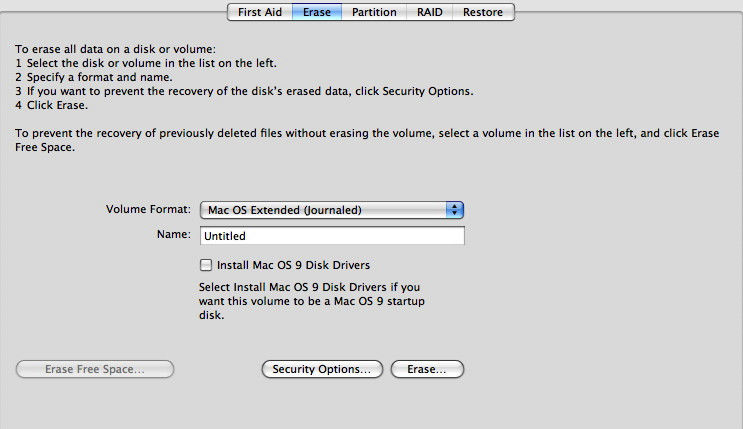
Step 2: In the Finder, tap Go on the top tool bar and then select Utilities. Or directly open Applications > Utilities > Disk Utility. The Disk Utility folder will turn on. As long as it is opened, you are going to see the list of available drives on the left side.
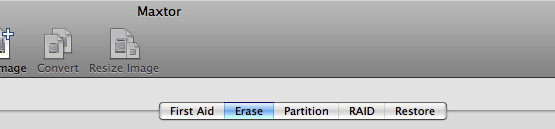
Step 3: Choose the Erase of the five options available in the main window.
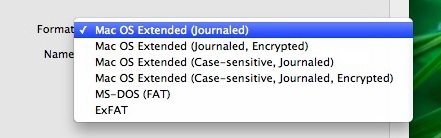
Step 4: The Disk Utility automatically choose “Mac OS X Extended (Journaled)” as the default format for the drive format, but if we would like to use the others, just tap on the “Formatting” options to see drop-down window.
Step 5: Now you need to enter a name for your external hard drive in the name field.
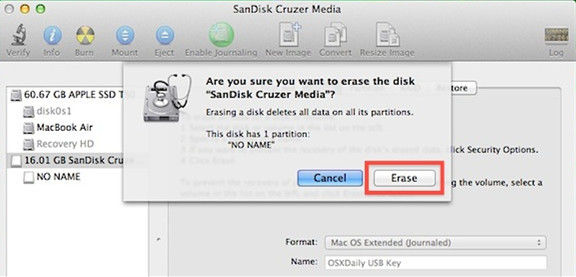
Step 6: Click the “Erase” button and then tap on “Erase” again in the pop-up window to confirm the operation.
That’s all about how to format an external hard drive on a Mac machine. Now the drive will be formatted and erased everything.
Extra Tips: How to Recover Hard Drive Data on Mac
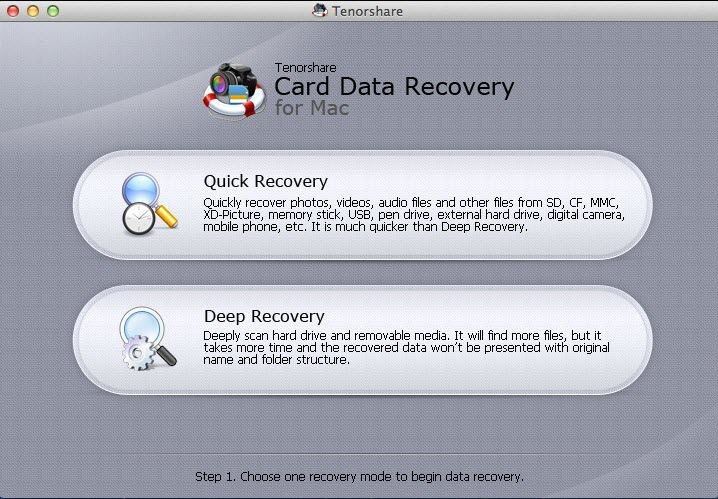
Last but not least, if you lose data while formatting external hard drive on Mac, try to use the professional and useful Card Data Recovery for Mac software and retrieve the deleted or lost data easily and instantly. You can’t miss it!
Step 1: Download, install and launch Card Data Recovery software. You will see 2 recovery modes, which are Quick Recovery and Deep Recovery. Just choose one of them. Then connect your external hard drive to your Mac.
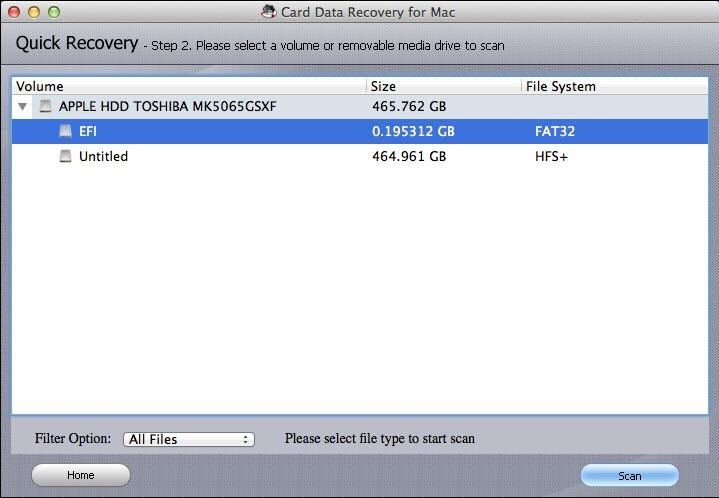
Step 2: Click Start button and then access another interface. Then choose your target external hard drive and click the Scan button on the bottom of the window.
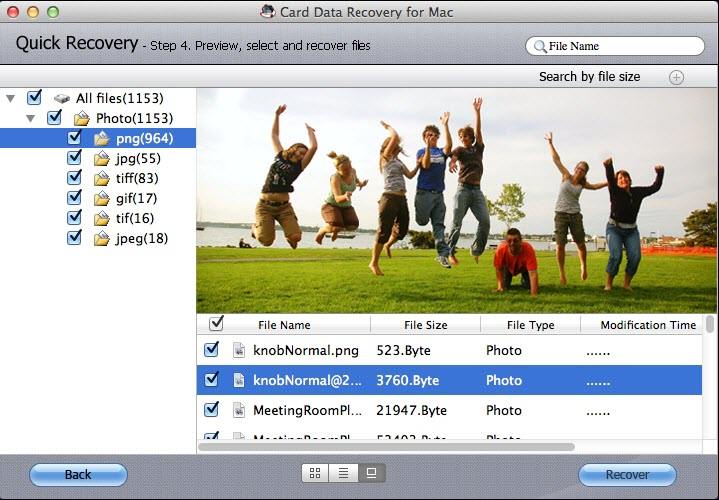
Step 3: Wait for a while, and then the software will show the data and now you just need to choose the data you wish to recover, and at last, tap on Recover button to recover the lost or deleted data with just one click.
Yeah, that’s all about how to format external hard drive and retrieve the lost data of the drive on Mac. Hope them are helpful to you all.
Get Card Data Recovery Now
Related Articles
- Top 3 Free Mac Recovery Software 2017
- How to Recover Photos, Videos and Files from SD Card on Mac OS X
- The Easiest Approach to Recover Data from SD Card on Mac OS X 10.10 Yosemite
comments powered by Disqus
Recommend Product
 |
Card Data Recovery User Reviews ( 12 ) $29.95 |
Best Card Data Recovery Solution -- Recover deleted or missing pictures, videos, music, Word documents, PDF files, etc.
Hot Articles
Social Connection
 Feel free to