How to Use Android Data Recovery Pro for Mac
Android Data Recovery Pro for Mac is an extraordinary data recovery tool to help you recover all lost or deleted Android files on Mac, including contacts, call history, photos, messages and etc. it's works well with Android phones and Android tablets, such as Samsung, HTC, LG, Motorola and more.
The following is a user guide on how to recover Android data on Mac. The overall steps are:
1. Connect Your Android Device
Android Data Recovery Pro for Mac provides 2 types of device connection: via USB cable or Wi-Fi.
Option 1: Connect Android Device via USB Cable
You can connect your Android device via a USB cable.
Step 1: Launch Android Data Recovery Pro for Mac and Choose "USB Cable Connection".
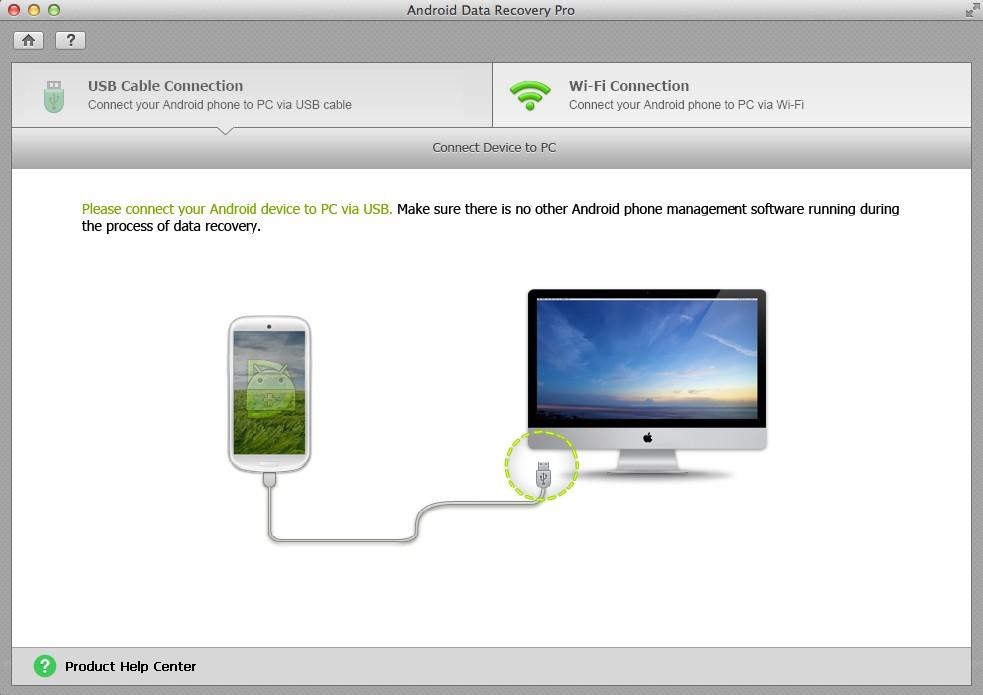
Step 2: Enable USB Debugging
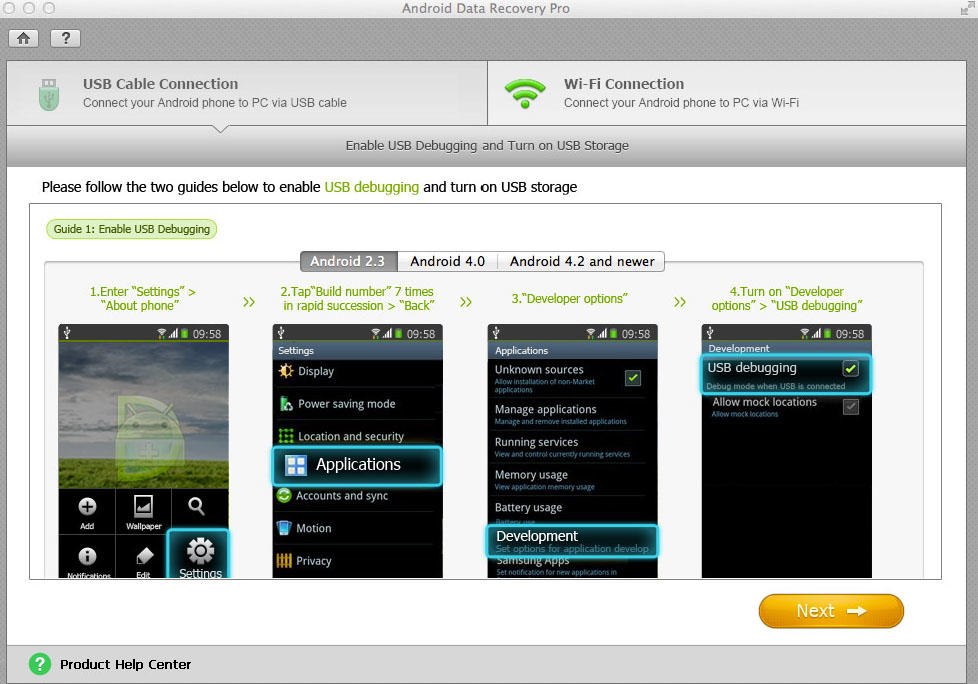
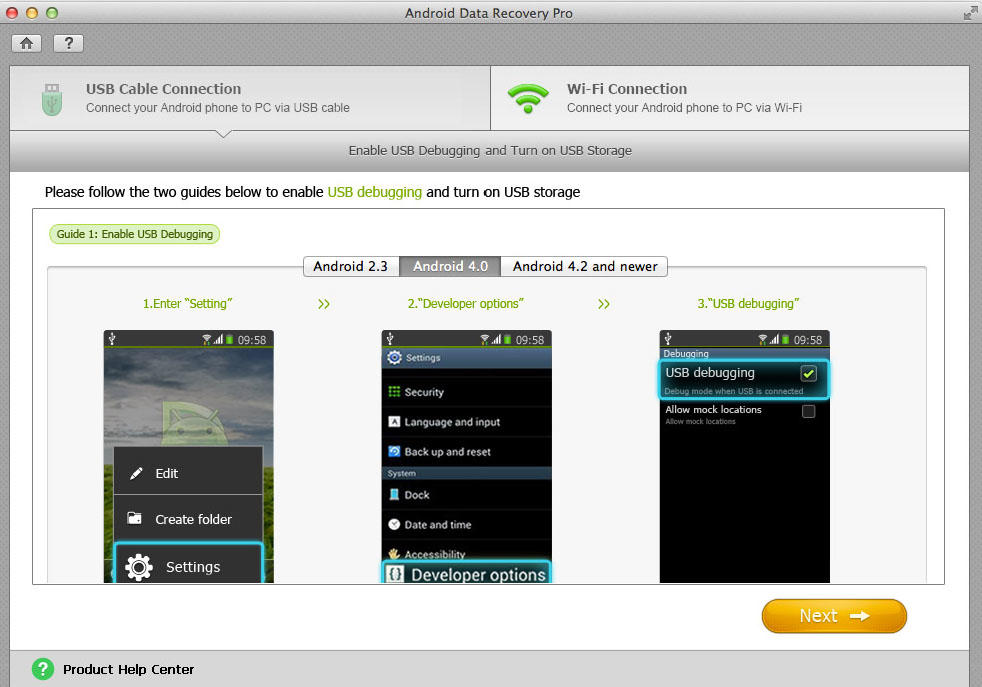
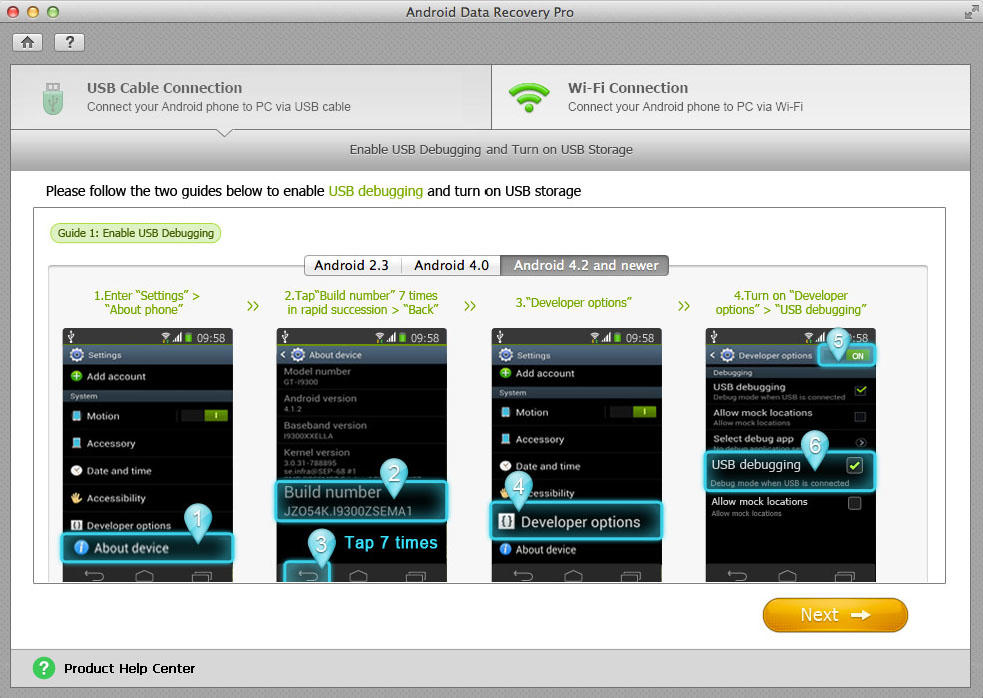
Follow the guide to enable the USB debugging. The process varies for different versions of Android OS.
- For Android 2.3 and earlier, go to "Settings" > "Applications" > "Development" > "USB debugging".
- For Android 3.0 to 4.1 (here takes 4.0 as an example), enter "Settings" > "Developer options" > "USB debugging".
- For Android 4.2 or newer, enter "Settings" > Click "About Device" > Tap "Build number" for 7 times until getting a note "You are under developer mode" > Go back to "Settings" > Click "Developer options" > Check "USB debugging".
Step 3: Turn on USB Storage
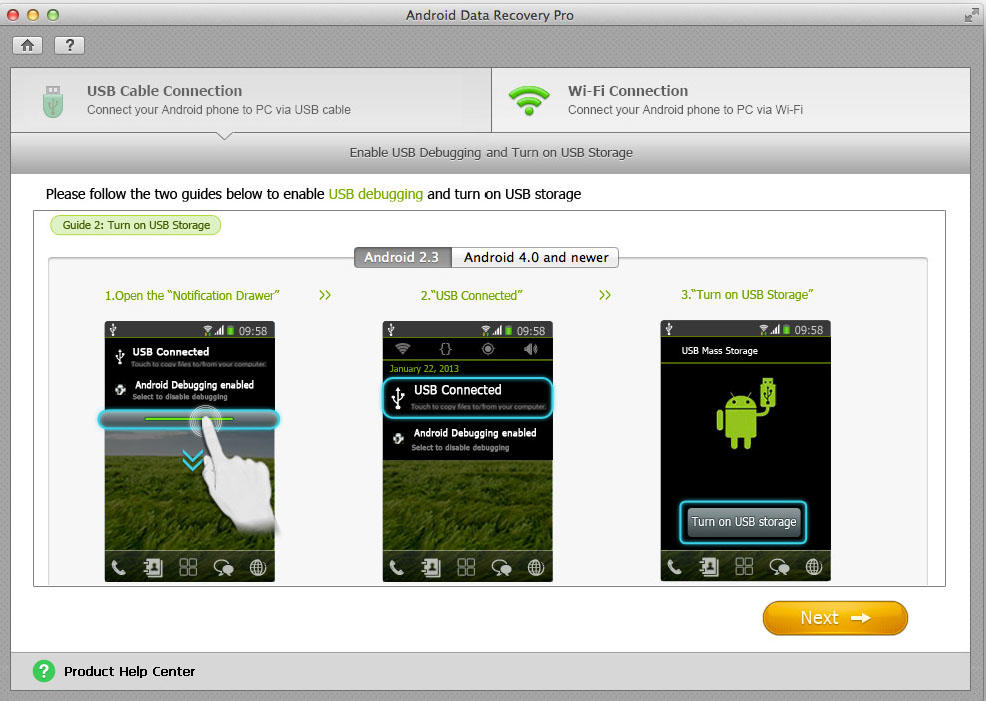
- For Android 2.3 or earlier, drop down the notifications, tap "USB Connected" and tap "Turn on USB storage".
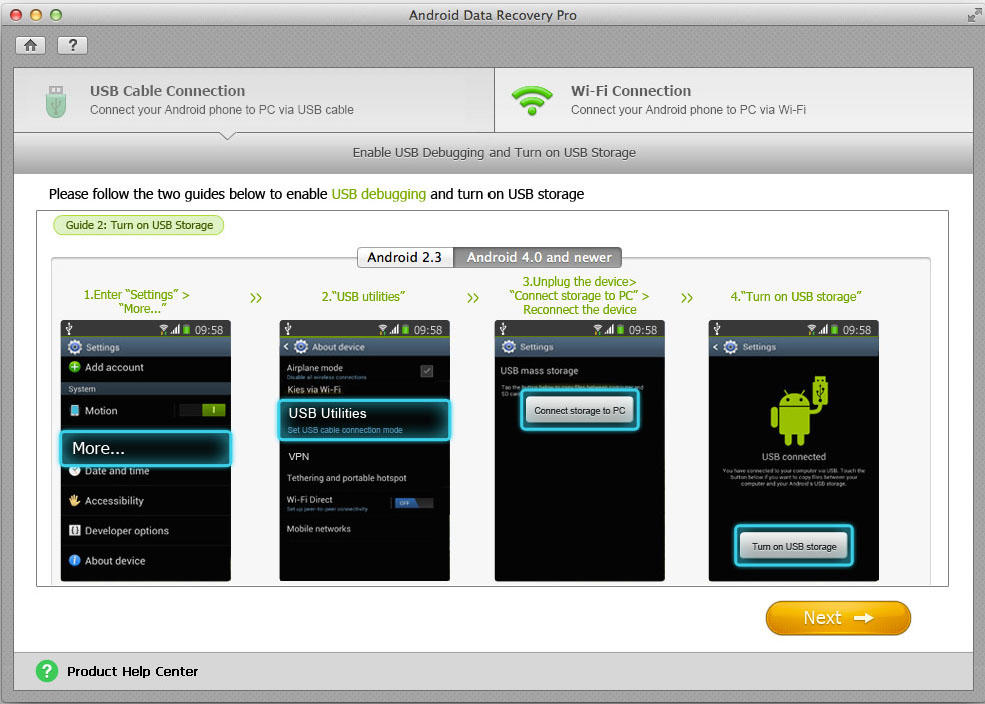
- For Android 4.0 or newer, go to "Settings" > "Wireless and Network" > "USB utilities" > "Connect storage to PC" > "Turn on USB storage".
Step 4: Enable Super User Authorization
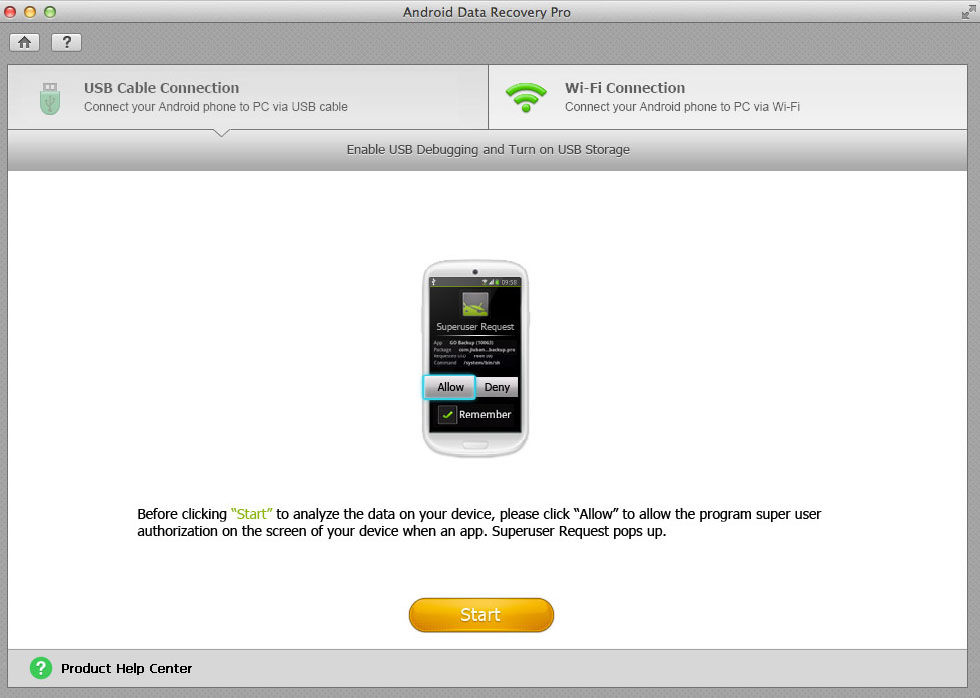
Click on "Allow" on your device to allow the program super user authorization on the screen of your device when an app. Superuser Request pops up. Then click on "Start" to analyze data on your device.
Option 2: Connect Android Device via Wi-Fi
Or, you can also connect your device via Wi-Fi network.
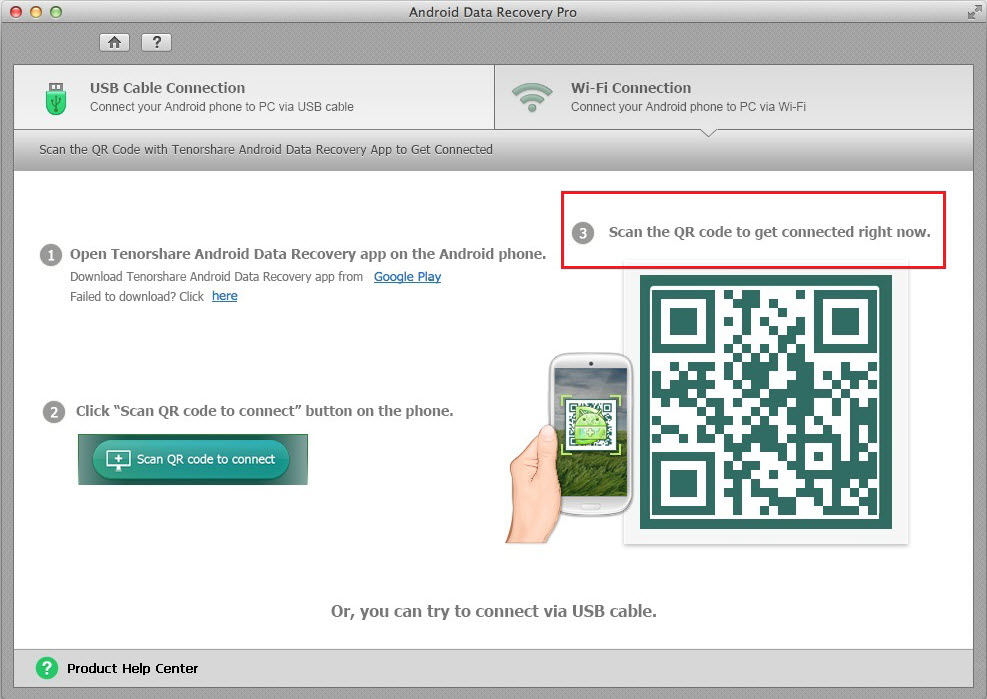
Step 1: open Android Data Recovery App on your Device
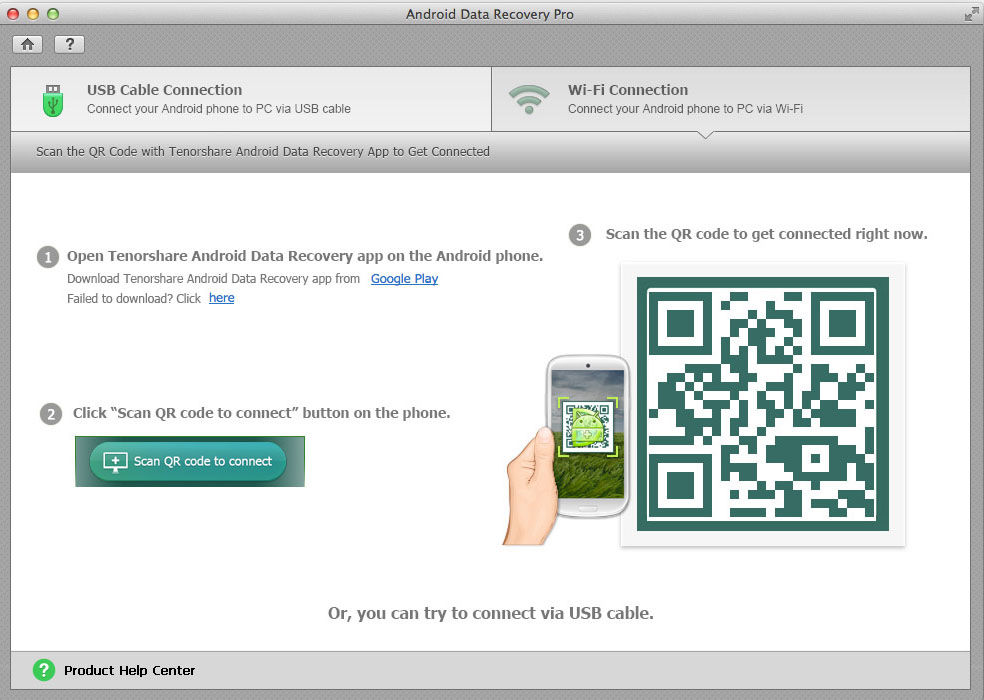
Download Tenorshare Android Data Recovery app from Google Play and run it on your Android phone. If you can't download it from Google Play, you can get the APK manually and install it by yourself.
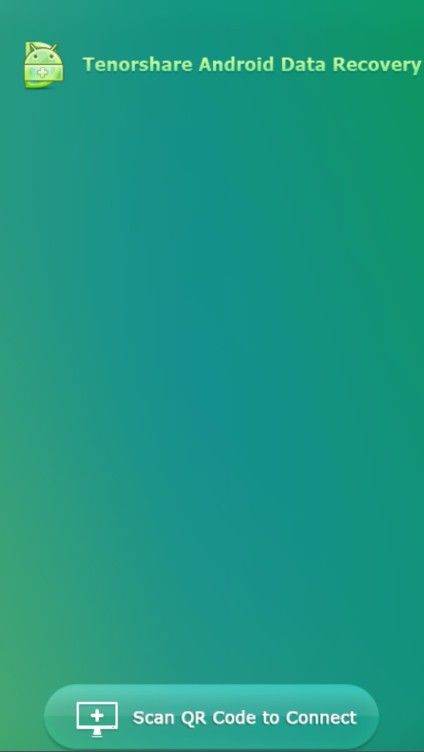
Step 2: Click on "Scan QR Code to Connect" Button
Tap "Scan QR Code to Connect" Button in Android Data Recovery app on your Android phone.
Step 3: Scan QR Code to Get Connected
Scan the QR code with Android Data Recovery app to get your device connected.
2. Scan Android Device
Android Data Recovery Pro for Mac provides 2 recovery modes:
Mode 1: Quick Recovery
This mode only takes several minutes to scan lost files on your android phone and presents them in original name and folder structure.
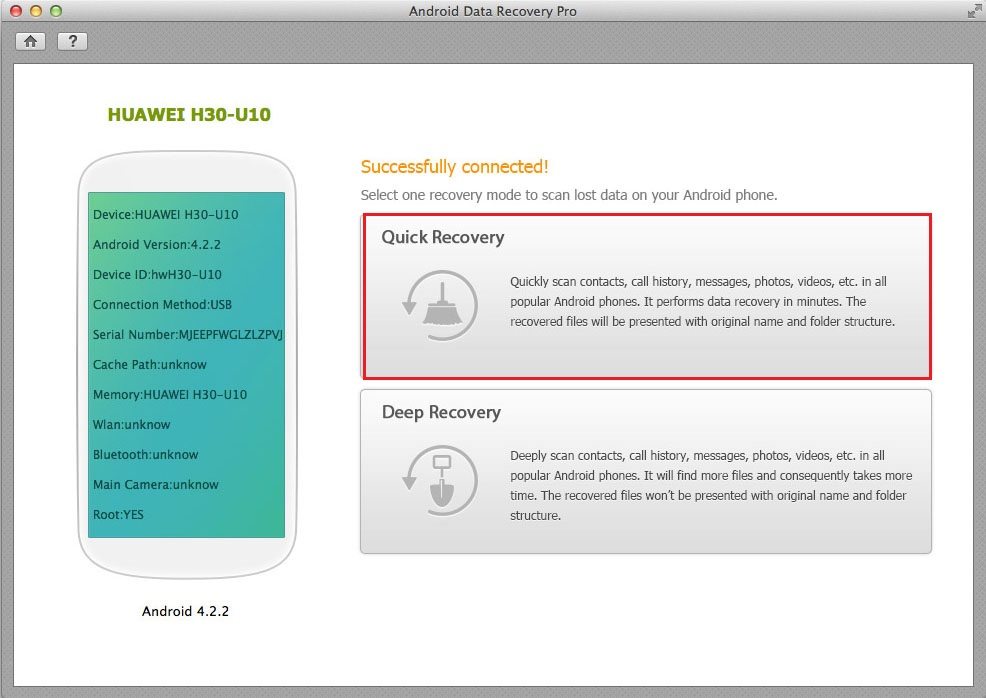
Step 1: Select Recovery Mode
Click on "Quick Recovery" to start scanning lost data on your Android device.
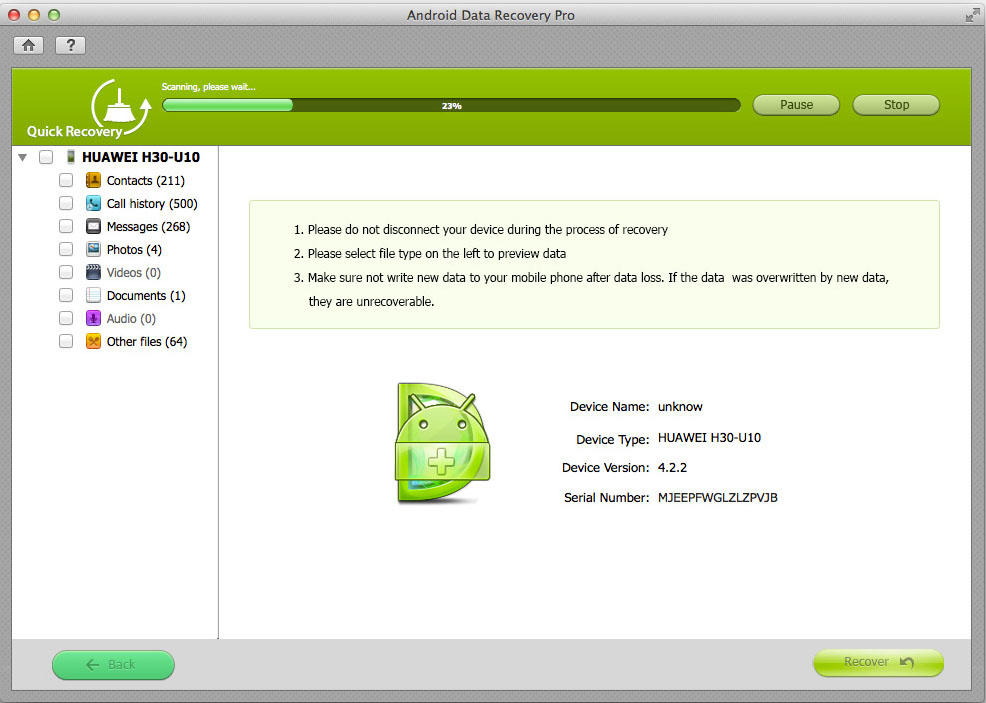
Step 2: Start to Scan Android Phone for Lost Data
It will take several minutes to scan lost contacts, call history, messages, photos and etc on your Android device.
Mode 2: Deep Recovery
If you can't find the lost files you want with "Quick Recovery", then you can use "Deep Recovery" with a 100% deep scan.
Step 1: Choose Recovery Mode
Click on "Deep Recovery" to deep scan all files on your device.
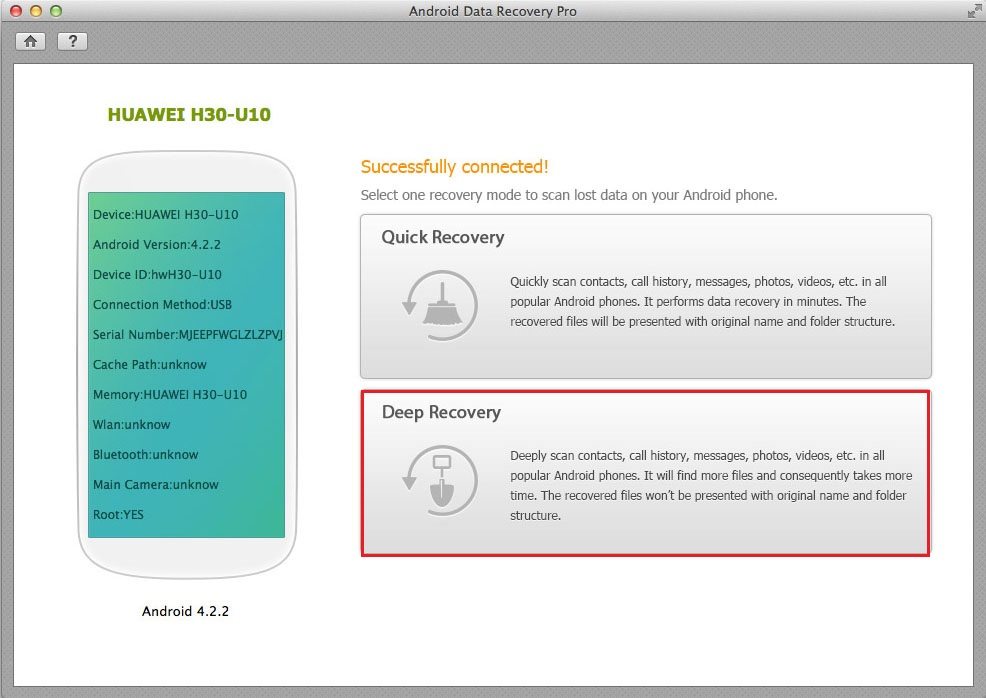
Step 2: Specify File Types to Scan
You can specify file type to start scan in order to save time. You can selectively turn off the file type you don't want to scan.
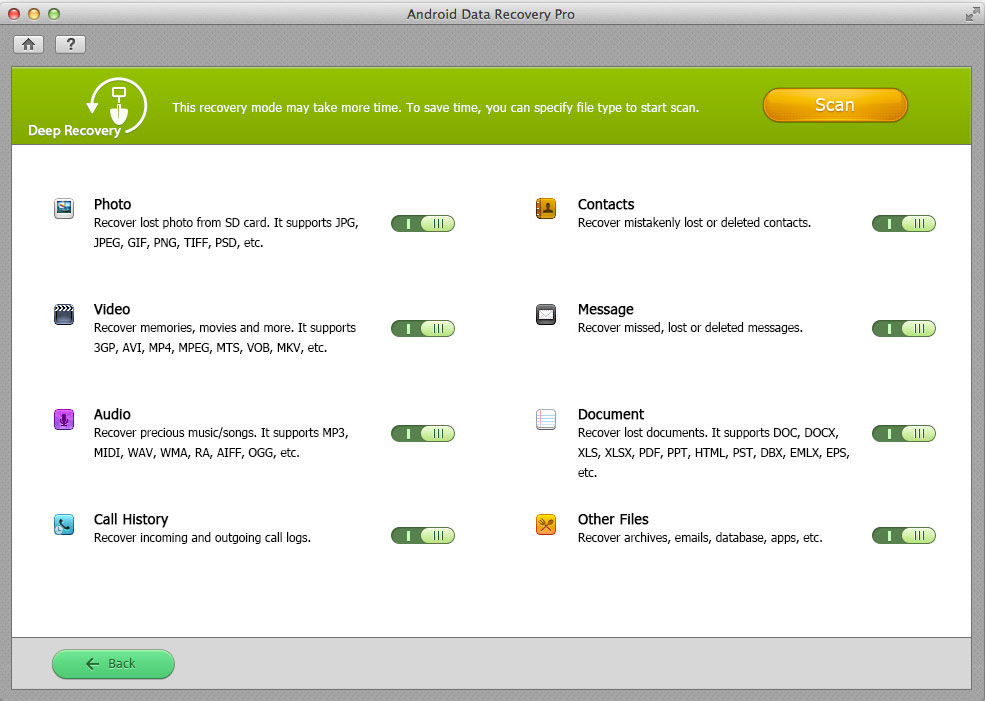
Step 3: Start to Scan Android Phone
Click on "Scan" to start both lost and existing files scanning. Wait patiently since it takes you relatively longer time.
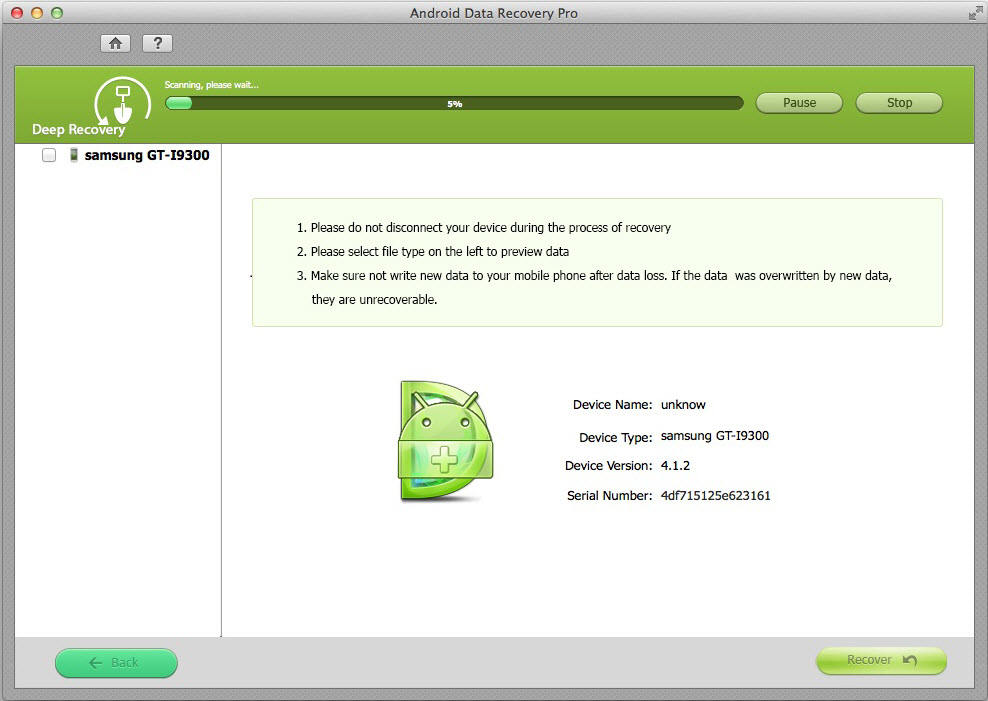
3. Preview and Recover Data
After a while, the recoverable files are listed by file types. Here we supposed you need to recover photos. Click "Photos" on the left and check the photo files appearing on the right. Click "Recover" to save them on your PC.
Step 1: Preview Android Data
After scanning, you files will be listed according to file types. You can select any one of them to preview first.
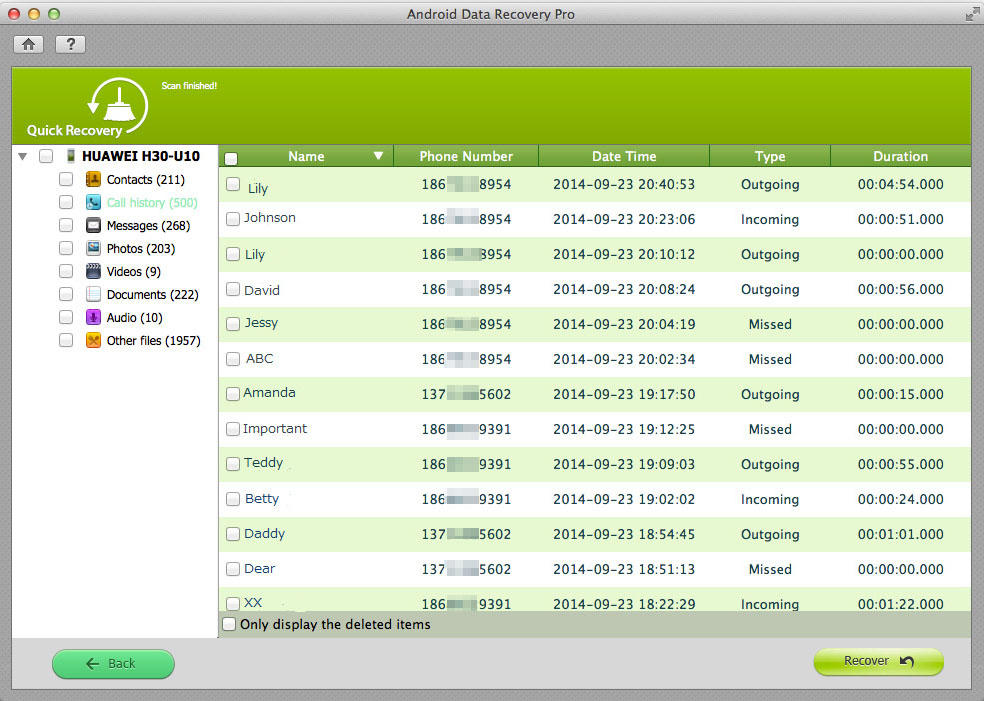
Step 2: Save Lost Android Files
Select the files you need to restore and click on "Recover". Then choose a save path.
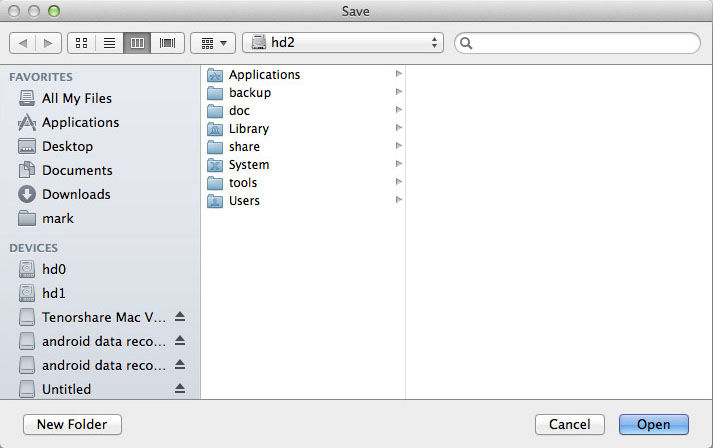
Contacts, text messages and call history will be saved in TXT, XML, or Excel. As for photos, you can save them in JPG, TIFF/TIF, PNG, BMP, GIF, and videos in MP4, 3GP, AVI, WMV, ASF, FLV, RM, M4V, MOV, 3G2, SWF, MPG. For audios, you are allowed to save them in MP3, MIDI, WAV, WMA, RA, AIFF, OGG, etc.
 |
Android Data Rcovery Pro for Mac User Reviews( 12 ) |
This software is awesome! It enables me to recover my .mdb file password only in one click. It's worth recommending to my friends.
- Jack from America
- How to Root Your Android Device the Easy Way
- How to Install USB Driver for any Android Device?
- A Quick Solution to Android Data Recovery
- Android Phone Data Recovery
- Recover Data from Android Phone
- How to Recover Lost Files from HTC One S
- Recover Data from LG Phone
- Recover Files from Motorola
- Nexus 4 Data Recovery
- Recover Files from Windows Phone 8
- Recover deleted photos, videos from Nokia lumia 920
- Samsung Galaxy S3 Data Recovery
- Recover Photos Videos from Samsung Galaxy
 Feel free to